Top 5 Sailing Knots - Sailing Orlando

5 Essential Must-Know Sailing Knots (How To Guide)

Learn how to tie five essential sailing knots every boater should know. This easy-to-follow guide offers practical tips and clear, step-by-step instructions designed for beginners getting started with knot tying.

Top 5 Sailing Knots - Sailing Orlando
Top 5 Sailing Knots

Step-by-Step Guide: How to Tie Essential Nautical Knots

Knowing how to tie the right knots is a fundamental skill in sailing and boating. From securing a fender to docking your boat safely, the ability to use proper sailing knots can make all the difference. Before we dive into how to tie these essential sailing knots and their practical uses, it’s important to understand the basic parts of a rope—also called a “line” in boating. Knowing these terms will help you follow knot-tying instructions with confidence.

  • Standing End: The fixed or long end of the rope, usually secured to an object.
  • Running End: Also known as the “bitter end,” this is the free end of the line that you’ll manipulate when tying knots.
  • Bight: A loop or half-loop formed when the rope doubles back on itself.

Knot #1: How to Tie the Bowline Knot

The Bowline knot—often called the “King of Knots”—is one of the most essential knots every sailor should know. It creates a strong, fixed loop at the end of a line that won’t slip or jam under tension.

On a sailboat, the Bowline has a variety of uses: it’s commonly used to attach a halyard to the head of a sail, tie off gear on deck, or even serve as a quick rescue knot in a man-overboard situation.

Bowline Knot - Sailing Orlando
Bowline Knot for Sailing
  • Make a small overhand loop near the end of the rope (this is your “rabbit hole”).
  • Pass the running end of the rope up through the loop (the “rabbit comes out of the hole”).
  • Wrap the running end around the standing end of the rope (the “rabbit goes around the tree”).
Bowline Knot - Sailing Knots
Bowline Knot – Step 1
Bowline Knot - Sailing Orlando
Bowline Knot – Step 2
Bowling Knot - Sailing Orlando
Bowline Knot – Step 3
  • Bring the running end back down through the original loop (the “rabbit goes back into the hole”).
  • Tighten the knot by pulling the standing end while holding the loop steady.
  • Check the strength of the knot by holding the loop and pulling on the standing end
Bowline Knot - Sailing Orlando
Bowline Knot – Step 4
Bowline Knot - Sailing Orlando
Bowline Knot – Step 5
Bowline Knot - Sailing Knots
Complete Bowline Knot

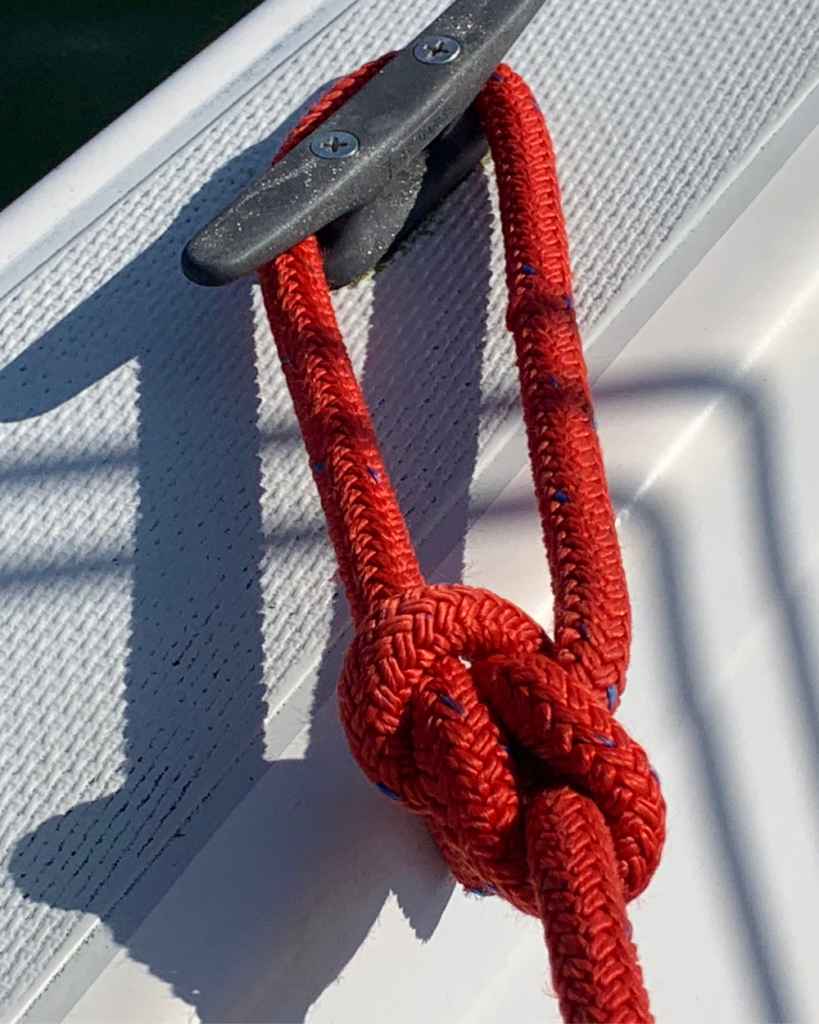
Knot #2: How to Tie a Figure 8 Stopper Knot

The Figure-Eight Stopper Knot is a simple but essential sailing knot used to prevent a line from slipping through a block or fairlead. Commonly tied at the end of jib sheets or mainsheets, this knot ensures the line stays secure and within reach—especially while underway. It’s a must-know knot for sailboat handling and line control.

  • Form a U-shaped bight at the end of the rope.
  • Twist the bight once to create a simple loop.
  • Pass the running end around the standing part of the rope and then back through the loop you just created.
  • Pull both ends to tighten, forming a secure figure-eight shape.
Figure 8 Stopper Knot - Sailing Orlando
Figure 8 Stopper Knot – Step 1
How to tie a Figure 8 - Essential Sailing Knots
Figure 8 Stopper Knot – Step 2
Figure 8 Stopper Knot - Sailing Orlando
Figure 8 Stopper Knot – Step 3
Figure 8 Stopper Knot - Sailing Orlando
Figure 8 Stopper Knot – Step 4

Knot #3: How to tie a Clove Hitch

The Clove Hitch is a versatile and reliable knot commonly used in boating to quickly secure a line to a post, rail, or cleat. It’s especially useful for tying fenders (or bumpers) to the side of a boat while docking, allowing for fast adjustments and easy removal. When tied correctly, the Clove Hitch holds firmly in place, but it can slip if not tightened properly—so care is needed. Its simplicity and adjustability make it a go-to knot for managing loose ends and temporary tie-offs on board.

  • Wrap the running end of the rope around the post or rail.
  • Cross it over the standing part of the line and continue wrapping around the object a second time.
  • Slip the running end under itself on the second wrap, creating an “X” pattern.
  • Pull both ends to tighten the knot securely around the object.
Clove Hitch
Clove Hitch – Step -1
Clove Hitch Knot - Sailing Orlando
Clove Hitch – Step -2
Clove Hitch Knot - Sailing Orlando
Clove Hitch – Step -3

Knot #4: How to Tie a Cleat Hitch

The Cleat Hitch is used to securely fasten a line to a cleat—whether on a dock or the deck of a boat.

While it may look simple, it’s often tied incorrectly, which can lead to serious safety issues.

This knot is most commonly used to tie a boat to a dock, but it also plays an important role on sailboats, where cleats are mounted to the deck or mast to secure lines like halyards after raising a sail.

Cleat Hitch - Sailing Orlando
Cleat Hitch Knot – Sailing Orlando
  • Take the working end of the rope (the free end) and make one full wrap around the base of the cleat.
  • Bring the rope diagonally across the cleat and tuck it under the opposite horn.
  • Take the line and go back across the cleat in the opposite direction, again tucking it under the second horn.
Cleat Hitch - Sailing Orlando
How to tie a cleat hitch – Step 1
Cleat Hitch - Sailing Orlando
Cleat Hitch – Step 2
Cleat Hitch - Sailing Orlando
Cleat Hitch – Step 3
  • Run the line around the bottom of the horn to create a figure eight.
  • Create a small loop with the rope and twist it so the standing part is underneath the working part (like making a pretzel).
  • Drop this loop over one horn of the cleat.
  • Pull firmly on the end of the rope to snug the hitch.

Knot #5: How to Tie a Round Turn 2 Half-Hitch

The Round Turn and Two Half Hitches is a reliable, easy-to-tie boating knot that’s perfect for securing your boat to a dock post, ring, rail, or piling. This knot is known for its strength and stability, especially under load.
By wrapping the rope fully around the object (the “round turn”), most of the strain is transferred to the object itself—not the knot. This design helps prevent slipping and makes the knot easy to untie, even after it’s been under heavy tension.
Whether you’re docking temporarily or securing gear, this versatile knot is a boater’s must-know for safety and convenience.

Round Turn 2 Half-Hitch - How to Tie Essential Boating Knots
Round Turn 2 Half-Hitch – Essential Knot for Boating and Sailing
  • Wrap the line around the object – Start by passing the working (free) end of the rope around the post, rail, or ring.
  • Make a full round turn – Continue wrapping the rope a second time so that you’ve completed a full circle around the object. This round turn helps absorb the load and adds friction
  • Create the first half hitch – Take the working end and pass it over and then under the standing part of the rope (the part leading away from the object), forming the first half hitch
Round 2 half-hitch - Sailing Orlando - How to Tie Nautical Knots
Round 2 half-hitch Step 1
Round 2 Half-Hitch Knot - Sailing Orlando - Essential Boating Knots
Round 2-half Hitch – Step 2
Round 2 half-hitch - Sailing Orlando - Boating Knots
Round 2 half-hitch Step 3
  • Add the second half hitch – Repeat the same motion to create a second half hitch, just below or on top of the first.
  • Tighten the knot – Pull both the standing part and the working end to snug the knot tight. The knot should be secure, yet easy to untie even after being loaded.
Round 2 half-hitch - Sailing Orlando - Essential Sailing Knots
Round 2 half-hitch – Step 4
Round 2 half-hitch - Sailing Orlando - Learn how to tie boating knots
Round 2 half-hitch – Step 5
Round 2 half-hitch - Sailing Orlando - Learn Essential Boating Knots
Round 2 half-hitch – Step 6

Final Thoughts on Mastering Sailing Knots

Whether you’re docking your boat, securing gear, or just building your seamanship skills, knowing how to tie essential sailing knots is a must for any boater. Practice these knots regularly so they become second nature on the water. Over time, you’ll gain the confidence and efficiency every sailor needs.
Want to go deeper into knot-tying techniques? Check out this comprehensive Guide to Knots for Boating from AnimatedKnots.com—a trusted resource for step-by-step knot tutorials with helpful visuals.
Happy sailing—and knot tying!


Learn to Boat with the Central Florida Boating Association

Powerboating lessons - Learn to Boat
Powerboating Lessons with CFBA

Discover Orlando’s premier on-the-water boating lessons and youth sailing programs through the Central Florida Boating Association (CFBA).  Whether you’re honing your skills in power boats or embarking on the journey of learning to sail, CFBA’s classes are designed to enhance your skills and boost your confidence on the water. Visit www.CFLBoating.org to enroll today!

Recent Posts